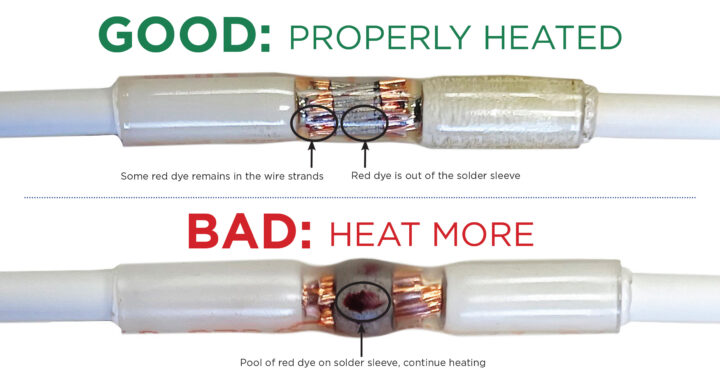
The thermal indicator aims to offer installers an extra visual signal as the solder sleeve transforms and flows into the crimp barrel window. A prevalent error when using solder connectors is insufficiently heating the solder, leading to a cold solder joint, which compromises termination quality. To avoid this, the red dye provides an additional visual cue, prompting installers to apply adequate heat to the solder connector, guaranteeing optimal tensile strength and conductivity.
Key Features of the Thermal Indicator Heat Shrink Butt Connectors
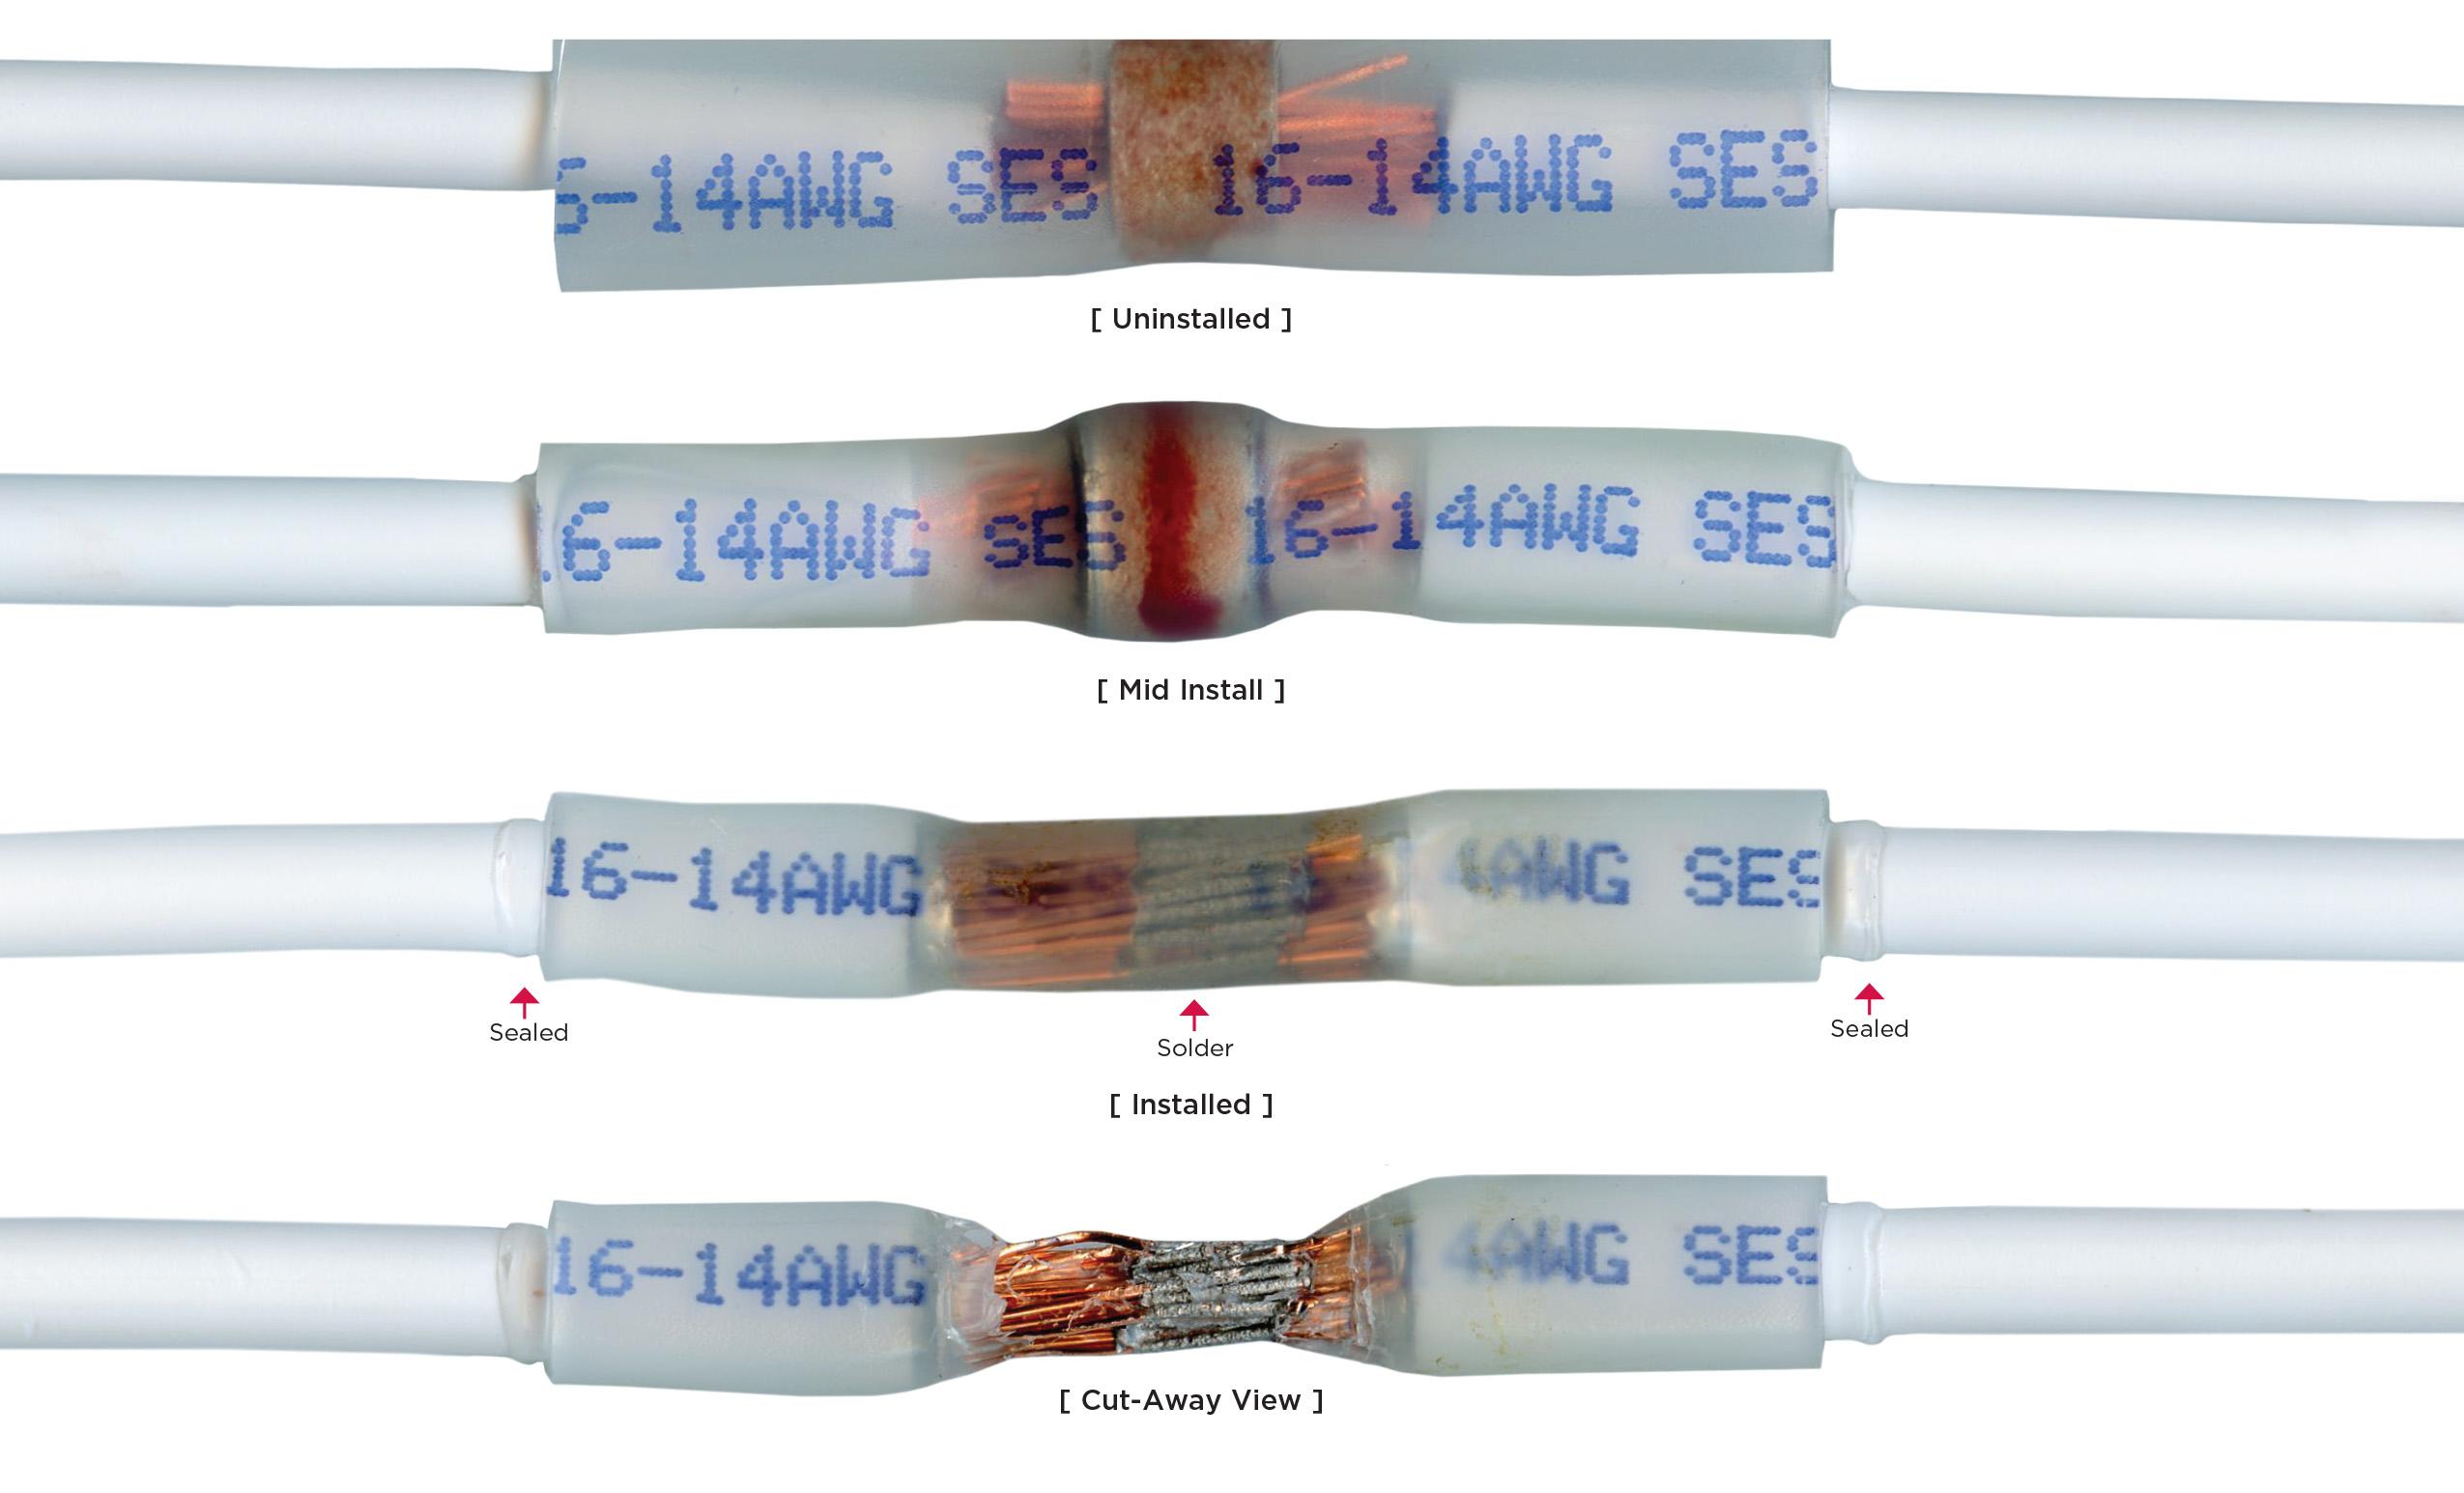
The 3 Key features are the clear adhesive-lined heat shrink tubing, window butt connectors and the thermal indicator solder sleeves. The tubing’s transparency facilitates thorough visual inspections, complemented by color-coded prints for easy identification. Enhanced adhesive ensures a robust seal, while a seamless barrel with a window and wire stop optimizes functionality. The window, strategically positioned between color-coded dots across three primary sizes, allows for clear observation of solder flow. Aligning the color-coded dots for maximum visibility, a red thermal indicator vanishes from the solder sleeve upon proper solder flow. Leveraging a lead-free solder alloy with superior surface tension, termination strength is bolstered. Furthermore, the “no-clean” flux on the solder sleeve efficiently cleans metals, contributing to high-quality solder terminations.
Steps for Installing Thermal Indicator Butt Connectors
- Strip both wires 3/8”
- Insert wire into barrel
- Crimp colored dots on barrel. If no dots present, crimp on center of barrel between end of solder sleeve and end of crimp barrel. (Skip this step if you are not using a crimp style connector.)
- Heat tubing
- When the window appears and majority of red dye disappears, the solder has flowed into the crimp barrel. Remove from heat.
The window is located between the color dots, except the 980005TI which doesn’t have dots. Apply heat evenly to the entire length of the connector until the shrink tubing recovers to the wire insulation. The installer should continue to heat the connector until they have a clear visual of the window in the center. When the window in the center of the connector is visible and majority of red dye disappears, the solder has flowed. There can be a “pool” of red dye opposite of the window and/or some red dye in the window.
Proper Thermal Indicator Flow