Wiring and power systems can be complex—especially when it comes to components like solenoids. Whether you’re working on a boat, RV, industrial equipment, or another DC-powered system, a solenoid plays a critical role in controlling electrical current.
So how can you tell if your solenoid is working properly? Follow this step-by-step guide to test your solenoid and ensure your system is operating safely and efficiently.
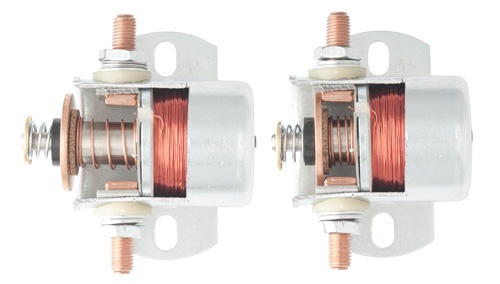
What Is a Solenoid?
A solenoid is an electrically controlled switch that uses a small current to activate a larger current circuit. It’s commonly used to control high-power devices from a lower-power signal—making it essential in systems that rely on batteries and controlled power distribution.
What You’ll Need
- A Multimeter
- A Solenoid
- Jumper wires or cables (optional)
- Protective Eyewear and Gloves (recommended)
- A second person to assist (optional but helpful)
Step 1: Locate the solenoid
Start by identifying the solenoid within your system. Solenoids are typically small cylindrical or rectangular components with two or more terminals.
You’ll usually find them:
- Near a battery or power source
- Integrated into a control panel or electrical system
- Mounted close to the device they control

Look for two main terminals (for high-current connections) and possibly one or two smaller control terminals.
Step 2: Perform a “Click” Test
When power is applied to the solenoid’s control circuit, it should activate with an audible “click.”
How to test:
- Apply power to the control terminals (either by turning on the system or using a switch).
- Listen carefully for a click.
What it means:
- Strong, clear click: The solenoid is likely engaging properly
- Weak or repeated clicking: Possible low voltage or internal wear
- No sound: The solenoid may be faulty or not receiving power
Even if you hear a click, continue testing to confirm full functionality.
Step 3: Test Voltage with a Multimeter
Setup:
- Set your multimeter to measure DC voltage
- Connect the positive (red) probe to the output terminal of the solenoid
- Connect the negative (black) probe to the input (battery-side) terminal or system ground

Test:
- Activate the solenoid (turn on the switch or control circuit)
- Observe the voltage reading
Results:
- A small voltage drop (typically around 0.3–0.5V) indicates normal operation
- A larger voltage drop may signal internal resistance or worn contacts
- No voltage change could mean the solenoid is not activating
Also verify your system voltage (commonly ~12V or ~24V depending on your setup). If system voltage is too low, the issue may not be the solenoid.
Final Thoughts
Testing a solenoid doesn’t have to be complicated. By following these steps, you can quickly determine whether your solenoid is functioning correctly or needs replacement.
If you’re still experiencing issues:
- Check for corrosion or loose connections
- Ensure all terminals are clean and secure
- Confirm proper voltage is reaching the unit
A properly functioning solenoid is essential for safe and reliable power control—so taking a few minutes to test it can save time and prevent bigger system issues down the line.